How to Build a Curly Girl Method Routine
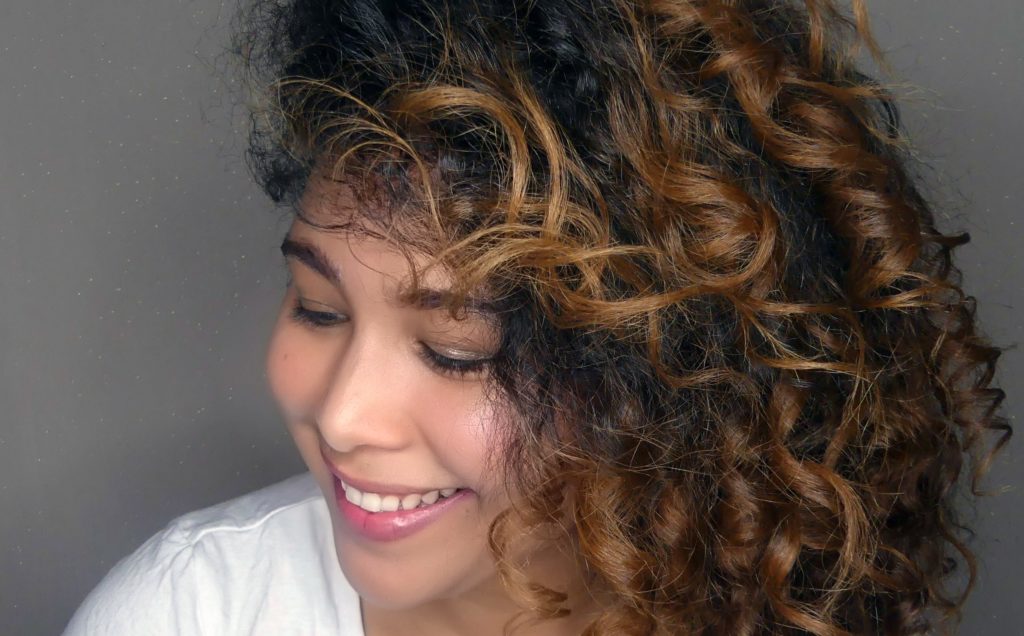
If you’re new to the Curly Girl Method or considering giving it a shot, one of the first things you’ll need to figure out is your curly hair routine.
But when you’re just starting out, it can be difficult to know where to start and what to consider.
This post aims to simplify things as much as possible so you can build a Curly Girl Method Routine that gives you some fabulous curls!
Here’s how you can go about creating your own Curly Girl Method Hair Routine. We’ll focus on showering, styling, and drying, plus how to modify your routine as needed.
Side note: This page does contain affiliate links, which means if you purchase something using the product links on this page, I may get a small commission. This comes at no extra cost to you and helps keep this site running. Thank you!
Create your shower routine
The first aspect of your routine is going to be how you care for your hair in the shower. This breaks down into two key areas: washing and conditioning.
Wash: Shampoo or Co-wash?
When it comes to washing your hair, the Curly Girl Method gives you two main options: Washing with a sulfate-free shampoo or washing with a conditioner (aka, co-washing).
It’s up to you to decide which you prefer and which one your hair responds best to. The Curly Girl Handbook (which is where the Curly Girl Method began) says you should be able to get by with co-washing.
But if you’re like me and find your hair doesn’t come clean enough with co-washing alone, a sulfate-free shampoo maybe a better option.
If you’re just starting out, you may want to start with a sulfate-free shampoo to ease your hair into the transition period and then give co-washing a shot down the line.
No matter which option you choose, the goal of this step is to apply shampoo/co-wash to the scalp only and gently massage the scalp with your fingertips.
Your hair should get clean enough from the shampoo/co-wash that runs down the hair shaft while you wash.
My two favorite shampoos are Cantu’s Cream Cleansing Sulfate-free shampoo and Cantu’s TXTR Scalp Soothing Shampoo (read my review here).
My favorite co-wash is Suave Essentials Coconut Tropical Coconut.
Condition
Next, it’s time to condition. Use a curly girl approved conditioner to coat your hair. Start with a palm-full, but be prepared to add more until your hair is pretty saturated.

The newer you are to the Curly Girl Method, the more conditioner you’ll need.
Once your hair is saturated in conditioner, gently side your fingers through and detangle.
When you’re hair is detangled, tip your head to the side and gently scrunch your hair to your scalp to encourage the curl pattern.
You can leave the conditioner in for the remainder of your shower to hydrate your hair.
At the end of your shower, rinse the conditioner out of your hair.
My favorite rinse out conditioner is Tresemme Botanique.
Create your styling routine
Before you style, you may want to remove some of the excess water from your hair. You can do this by gently scrunching your hair with a t-shirt (not a towel) until it’s no longer dripping.
If you find your hair ends up very dry and frizzy as the day wears on, you may want to remove less moisture going forward.
Then it’s time to style your hair.
Choose your products.
There are typically three common products Curly Girls style with: leave-in conditioner, curl cream, and gel.
However, gel is the only true “staple” product of the Curly Girl Method. As a result, I would suggest starting with just gel when you’re first building your routine and adding other products in as your hair seems to need them.
Start with about half a palmful of gel, and add more or less based on how your hair responds. If your hair feels heavy with build up, you may want to use less. If it’s frizzy and your curls aren’t clumping, you may want more.
You’ll likely need more the earlier you are in the Curly Girl Method.

My favorite gel (especially for Curly Girl beginners) is Eco Styler Olive Oil Styling Gel.
If you’re only using gel and find your hair is dry and frizzy, try adding some leave-in conditioner.
You can use some of your rinse out conditioner (or you can leave some in when you rinse, instead of rinsing it all out), or you can buy a designated leave-in conditioner for this purpose. (I use about a quarter-sized amount of my rinse out).
If you find your hair isn’t getting a great curl, you may want to add a curl cream. My favorite curl cream is Cantu’s Moisturizing Curl Activator. (You can read my review here.)
Choose your technique(s)
The Curly Girl Handbook suggests spreading products on your hands and scrunching it into your hair with your head tipped to the side or upside down.
If you find that your hair doesn’t seem to be coated evenly enough with scrunching alone, you may want to try using the Praying Hands technique.
Here, you’ll spread the product over your hands, then smooth the product over your hair from top to bottom with your hands in prayer. When you’re finished, scrunch your hair to encourage the curl pattern.
You can see both of these techniques discussed in more detail in my curly hair routine post.
Drying
When it comes to drying your hair, again, you’ve got options! The three best and most practical drying methods are airdrying, diffusing, and plopping.
You may want to choose one or pick a combination.
One important thing is to avoid using a towel. They pull too much moisture out of the hair and lead to frizz.
If you’re used to using a towel, consider a t-shirt or a microfiber towel instead.
Airdry
One key component to the Curly Girl Method is avoiding heat. This means you don’t want to blow dry your hair.
As a result, air drying is ultimately the friendliest option.
If you need help with root volume, you may want to try some of these options.
Diffuse
If you don’t have time to wait for your hair to air dry, you can use a blow dryer with a diffuser on a lower heat setting to diffuse your hair.
Using a high heat setting will open the hair cuticle and cause moisture to escape, which can lead to frizz. It’s also a good idea to use a lower air setting to prevent friction and frizz.
If you have some time to play with, you can also air-dry your hair part of the way and then finish with a diffuser.
Plop
If you’re someone who usually puts your hair up with a towel, you can try doing the same thing with a microfiber towel, or you can try plopping with a microfiber towel or t-shirt.
Plopping consists of spreading your t-shirt or towel on a flat surface, then lowering your curls onto it with your head upside down. Then you tie your t-shirt/towel around your head while your hair dries.
You can let your hair dry completely like this or just part of the way.
I don’t plop my hair, so I can’t speak to it directly, but here’s a YouTube video that goes over the basics if you want to learn more and give it a shot.

Fine-tune by modifying one element at a time
Once you’ve built your curly hair routine, fine-tune it by modifying one element at a time.
If your hair is frizzy, try adding some leave-in conditioner. If that makes your hair look better, but you still have some frizz, try adding a little more gel. And If that doesn’t work try some curl cream.
You also may want to try different products to see how your hair responds.
It may take some time to figure out what works best for your hair, but changing one element at a time is the best way to find the products, techniques, and amounts that work best.
Decide how often to repeat
Ideally, a quality Curly Girl Method hair routine will make it so you can cut back on the number of days you wash your hair.
But in the beginning, when your hair is drier and needs more moisture, you may be washing (or at least wetting and conditioning) your hair every day for the best results.
You may want to start with using your routine every day, then cut back to every other, and every third as your hair gets healthier and more hydrated.
At this point, nearly two years in, I wash every 3-4 days, but for the first year, I started every day with wet hair.
I would only wash once or twice a week, but my hair needed the daily moisture and conditioner to look decent.
It’s okay if you have to do your complete routine more regularly, especially early on. What’s most important is that you do what works for you and your hair.

Looking for more guidance on your curly hair journey?
For beginners
If you’re new to curly hair care and looking for some help, you should check out the No-Stress Guide to Curly Hair Care!
After spending two years learning and caring for my curly hair, I wanted to create my own, in-depth guide to help fellow curlies create incredible curls in the easiest way possible.
It took me a while, but I eventually found an approach that helped me create a curly hair routine that fits into my life in the simplest way possible. And now I want to help you do the same!

For more intermediate/advanced guidance
If you’ve been on your curly hair journey for a while but still have some struggles, check out Curly Hair Problems!
After spending hours scouring the internet looking for solutions to my own curly hair problems, I found myself wishing for an easier, more comprehensive guide to the most common problems.
So that’s what I created!
Curly Hair Problems offers you 78 total solutions to the five most common curly hair care problems, including frizz, curl clumps, limp curls, product issues, and scalp issues.

Sound off: What’s your curly girl method hair routine? Tell us about it in the comments, and make sure to tell us about your hair type.






Hello, I am new to the curly girl method. I have figured out that im somewhere in between 2a and 2b. I was just eondering how people might put their hair up in a pony tail without brushing it. I have to have my hair tied back in some way because i am a caregiver and work around food. I always end up brushing out most of my waves when i put it up. Any suggestions would be greatly appreciated.
I typically do a high ponytail, so what I do is tip my head upside down and let gravity do most of the work, then I gather my hair at the crown of my head and loop a scrunchi around it twice. If you’d like your ponytail lower, I’d say you can try the same idea, just tip you’re head backwards instead of forwards. I hope this helps!