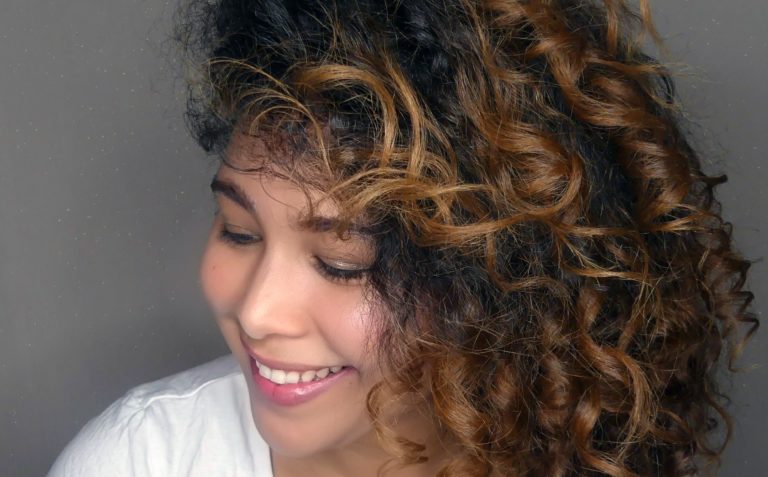
My Curly Hair Routine | Updated Curly Girl Method Wash Day

It’s been about seven months since I first posted my curly hair routine. At that point, I’d been following the Curly Girl Method for a year.
Since that post, I’ve made some changes and modifications to my routine as my hair has continued to change and evolve.
I’ve added some steps, modified some steps, and changed out some of my products. So, I wanted to give you a post with my updated routine!
Just like with my last post, I hope this post helps you create your own routine or helps you modify an established routine to complement your evolving curls!
Without further ado, here is my current Curly Girl Method routine for a wash day!
Side note: This page does contain affiliate links, which means if you purchase something using the product links on this page, I may get a small commission. This comes at no extra cost to you and helps keep this site running. Thank you!
Wash
At this point, I only wet and wash my hair every three days, which is a pretty big development for me!
For most of my Curly Girl Method experience, I had a terrible time refreshing my hair.
I used to wash every 4-5 days and co-wash in between. But no matter what, every day started with wet hair. If I didn’t my hair would frizz.
Now that I’ve got a refresh routine (you can find that here), I only wet my hair every third day when I’m actually going to wash it.
I’ve come to LOVE Cantu’s TXTR scalp shampoo, which has done a lot to help my dry scalp.
(You can check out my review here, and learn more about my dry scalp struggles here.)
Once my hair is wet I use the targeted applicator to apply the shampoo directly to my scalp.
I massage my scalp with my fingers and a shampoo brush.
Then I rinse.
Condition
The next step in my curly hair routine is conditioning!
Like in the past, I follow the method recommended in The Curly Girl Handbook. First, I take about a palmful of conditioner.

Then I gently spread it over my hair like I’m icing a cake, doing my best to avoid the scalp.
Once my hair is coated, I start to work the conditioner through my hair and detangle as I go. I pay special attention to the nape of my neck, which tends to have extra tangles.
I usually need more conditioner about halfway through–the goal is to get your hair saturated so your fingers slide through with very little resistance.
The biggest change to my conditioning approach is that now, I mix a few different conditioners every time I wash.
I start with Suave Essentials Tropical Coconut conditioner for my initial conditioning and detangling. Then, when I reach that halfway point and need more conditioner, I reach for Mane N Tail Conditioner (You can find my review here).
This is because as my hair’s gotten healthier, I found that the Tresseme alone as a little too heavy on my hair, but the Suave wasn’t quite moisturizing enough on its own. Mixing them, however, gives me a good balance.
Once my hair is completely detangled, I flip my head upside, cup my curls in my palms, and squish my hair (full of conditioner) up towards my scalp. (AKA squish to condish).
This encourages the hair’s natural curl pattern.
Then I leave the conditioner in my hair for the rest of my shower.
I know this looks and sounds like a lot, but honestly, this process doesn’t take me more than three to five minutes.
Rinse out
This part of my Curly hair routine is the same as before.
At the end of my shower, I rinse my conditioner out completely.
I used to leave some conditioner in my hair, but
If I don’t rinse out, I end up with conditioner build up on my scalp that flakes off throughout the day. It’s gross and uncomfortable!
But if you’re giving this routine a try and you find that your scalp-avoiding skills are stronger than mine, you can skip this step and just leave some conditioner in your hair (though it will likely take some trial and error to figure out how much to leave in).
I use cold water to rinse out (with my body out of the spray) to seal the hair cuticle and lock in moisture.
Remove excess water
The beginning of this step is the same as it used to be.
First, I gently run my hands over my hair in a downward motion to brush off excess water.
This used to be all I did. Now, I also grab a t-shirt and (with my head still upside down) gently scrunch upward twice to remove excess water.
I used to do this in the very beginning when I first started following the Curly Girl Method. But I found at the time, even this was taking too much moisture out of my hair, and I had much better results skipping this step.
But lately, it’s been taking my hair forever to dry. I decided to give this a shot again to see if maybe the reason it was taking my hair so long to dry was that my hair didn’t need as much moisture as it used to.
This turned out to do the trick! My hair dries faster, but with no added frizz!

Leave in
Just like in the past, my product application starts with a leave-in conditioner.
I still apply all my styling products as soon as I get out of the shower.
I flip my hair upside down, and I leave my head like this until all of my products are applied.
Then I squirt about a little more than a quarter-size amount of conditioner in my hands.

I coat my hands in conditioner then spread the conditioner over my hair using the praying
Then I cup my curls and scrunch up toward my scalp to encourage the curl pattern.
I’ve found regular conditioners make the best leave-ins in small amounts
(Side note: I only use a leave-in because I rinsed all the conditioner out of my hair in the shower. If you left some conditioner in your hair, you can jump to the cream.)
UPDATE 5/20/22: I no longer use a leave-in. My hair seems to be holding moisture better and the leave-in was weighing in down.
Cream
I’ve always needed a hair cream to help my hair stay moisturized throughout the day. If you’ve been following this blog for a while, you know my favorite cream used to be the Not Your Mother’s Curl Talk Defining Cream.
Unfortunately, that cream stopped working for me a few months ago, and I recently switched it up to Cantu’s Curl Activator Cream. You can check out my full review here.
I love this cream! It leaves my hair soft, and my curls frizz-free and fabulous for days.
However, it’s really easy to use too much of this! I find I only need about a little more than a fingertip’s amount for my entire head.

Then just like with the leave-in, I spread the product evenly over my hands, then use the praying hands technique.
If your hair needs extra help curling or if you like a tighter curl, you can scrunch here. I like my hair to curl a little looser, so I don’t scrunch until after I put gel in.
Gel
This step is almost identical to the previous post. The only difference is I use a little less gel now than I did in the past.
My favorite gel is still Biotera’s Styling Defining Gel (you can check out my review here). However, I used harder hold gels earlier in my Curly Girl process and they worked fine!
My hair is still tipped forward, but this time, I’ll separate it into two sections.
I squirt about half a palmful of gel into one hand. (I’m writing this with the Biotera gel in mind. You may need more or less if you’re using a different gel).

I spread the gel evenly between both hands, then use the praying hands method to coat half my hair in gel and repeat for the second section of hair.
Then I (again) cup my curls in my hands and scrunch to the scalp to encourage the curl.
Drying
My drying process is practically the same!
I still tip
I still tend to have halo/surface frizz, so I take about a quarter-sized amount of gel, spread it between my hands, and gently coat the surface of my hair.
For root volume, I gently gather the top of my hair together and loosely clip it at the crown of my head with a large claw clip. This helps the roots dry lifted and using a large clip keeps the curls from getting crushed.
I remove clip after about an hour and a half.
I let my hair air dry completely. It typically takes 2-3 hours. While it dries, I get ready for the day, and start working.
Scrunch out the crunch
When my hair is completely dry, I have a gel cast coating my curls.
To get rid of this I tip my head forward again and gently scrunch upward toward my scalp to break up the cast. I also gently ruffle my hair at the roots for a little extra volume.
This always seems like A LOT when I writing it out, but now that I’ve got the hang of things, my whole wash day process only takes about five to ten minutes in the shower and five minutes after (excluding drying time).

Looking for more guidance on your curly hair journey?
For beginners
If you’re new to curly hair care and looking for some help, you should check out the No-Stress Guide to Curly Hair Care!
After spending two years learning and caring for my curly hair, I wanted to create my own, in-depth guide to help fellow curlies create incredible curls in the easiest way possible.
It took me a while, but I eventually found an approach that helped me create a curly hair routine that fits into my life in the simplest way possible. And now I want to help you do the same!

For more intermediate/advanced guidance
If you’ve been on your curly hair journey for a while but still have some struggles, check out Curly Hair Problems!
After spending hours scouring the internet looking for solutions to my own curly hair problems, I found myself wishing for an easier, more comprehensive guide to the most common problems.
So that’s what I created!
Curly Hair Problems offers you 78 total solutions to the five most common curly hair care problems, including frizz, curl clumps, limp curls, product issues, and scalp issues.

Sound off: If you try this curly hair routine, how did it work for you? (Be sure to tell us about your hair type). You can also share your routine! Leave it all in the comments!


Thank you for the info!!! I just bought the Biotera Gel the other day! Going well so far!
Yay! I’m so glad to hear it! <3
Cant wait to read about your refresh 2nd – 3rd day hair routine!
I want to thank you for all of the clear curly girl advice on your blog, including this post. Your product recommendations have been really wonderful for me even though our curl types are different. I think I’m a 2c curl type w/ low porosity and my curls are more wavy and less defined than yours. Still, the products you have suggested give me the best results over others I have tried so far. I wish I had read your posts and tried these products before I invested (both money and a lot of time experimenting) in a full line of DevaCurl products that did not work well for me! Most of all, as someone relatively new to the curly girl process, I find the format of your blog entries more helpful than the many available You Tube videos. While the You Tube videos are fun to watch and are also helpful, this format — where everything is visible and can be scrolled through — makes it much easier to go back and review (and re-review) steps of the process. In one of your posts, I saw you apologize for the “low-tech” approach, but I find this approach to be the most helpful so I just wanted to offer that input. Thanks so much for the time you’ve spent putting this information together. And your curls are absolutely beautiful — can’t wait to see what the refresh routine is as that is the one part of this journey that I also have not been able to work out (so I get my hair fully wet every day — a time suck because mine takes hours to dry). I’ll be interested in seeing what solutions you’ve come up with in that regard.
Thanks so much for your comment and for reading!! It really means a lot to how much these posts have helped you and that the formating and set up is easy to follow and accessible. The refresh post will be live in a couple of weeks! I hope it helps as much as the other posts have. Thanks again for dropping by and taking the time to comment. ❤️
I am very new to the curly girl method and I totally agree with Sarah! Could not word it any better if I tried. I am finding that I am understanding more about the method from your site. Thanks again for your hard work and input.
Thanks so much, Penny! I really appreciate knowing that! I’m really glad I can help! 😀
I second Sarah’s comment, beautifully worded. I just found you on pinterest and I’m so glad I did. I’m 60, and I am sick and tired of straightening my long, thick coarse hair. I’m not curly, but very wavy, type 2b I believe. I too love your uncomplicated format and the fact you are not too “chatty”. Sorry don’t mean to offend, but who has the time! Your a beautiful young lady, and I appreciate your time and talent. Thanks for saving me $$ and time.
Peace be with you!
Thanks so much, Susie! I’m really glad I could help and I’m really happy this format is accessible to so many of you! ❤️
Thanks for your videos – very helpful! I’m 78 so your “low tech” videos are quite accessible to me. I’m new to all of this and so far have gotten good, but not great results for the first day, but the second day is the real challenge and I believe this post will be quite helpful – or at least I hope so! My problem is that it would just take too long to air dry so I’m using my new hair dryer with a diffuser, at least on the first day. For the second day – and hopefully a day or 2 longer – I don’t have a routine yet. Other blogs recommend creating my own spray. I plan to try this with some lavender essential oil I’ve purchased. The only other thing I’ve tried is scrunching my dry, frizzy second-day hair with a generous amount of Argon oil – not the greatest technique, but will possibly work well enough when I’m pressed for time.
I’m glad these posts could help! It definitely takes some trial and error to figure out what works best for you. It took me a long time to find a second day routine that worked well for me. You’ll have to come back and let us know what you’ve had success with when you find something you really love!
I agree too!! This has been the MOST HELPFUL source of information I’ve found so far! I’m very grateful to have stumbled upon your blog on pinterest. Thank you for all the time and information you’ve made available for us ~not yet so~ curly girls! Looking forward to this new hair journey.
Thanks so much, Lauren!! I really can’t say enough how much I appreciate hearing from you! I’m so glad you landed here! ❤️❤️
Well said Sarah!
Thanks for your time and info createyourownreality!
Thank you for reading!! I’m so glad these posts are helpful! ❤️
I also REALLY appreciate the format you use with the gifs interspersed between the narrative. Pictures are worth a thousand words! Thank you!
Thanks so much!! I really do appreciate knowing that’s helpful! 😀
I’m brand new to this method and after a bunch of research your blog is the most helpful and I will keep coming back (&pinning!)
Thank you.
I’m so glad I could help! 😀
Hi Meghan, Love the “Low Tech” much easier to follow. I have been on the curly girl Journey for the last 6 months. After a lot of experimenting, I realized I have. Low porosity; 2c &3c. I have notice that my hair can’t handle products with coconut In it. I also have an issue with strong scents(migraines).
Can you recommend some protein free conditioners?
Conditioners cater to low porosity?
☺️ thank you, & please keep writing.
Lizzy
Hey Lizzy, I’m so glad you like the structure of the posts! 🙂 Unfortunately, I don’t have much experience with low porosity hair or protein-free conditioners. (My hair is more medium porosity and generally likes a little protein.) But what you can do is use IsItCG.com to enter conditioner ingredients and find a conditioner that’s right for you. The site will let you know if a product has protein in it. I hope this helps some!
Hi Meghan, Thank you so much for putting your videos together. I am going to join all the curly girls out there. I just hope my hair looks as good as yours. I really appreciate all the advise on application and products.
Jill
Hi Jill! Welcome to the curly girl method! Thanks so much for reading and commenting! I’m really glad my posts can help. ❤️
Hi there, i suffer the exact same refresh with water frizz issue. Wash day hair is great. Days after I lightly water and conditioner spray but hair is frizzier, so going to try running conditioner over it Instead tomorrow , curl cream works ok but hair feels heavy and dirty quickly. Fingers crossed!
Yes, I hope this helps!!
Thank you Meghan,
This is what I needed a long time ago. I’ve been trying to get a good routine for 2 years. But, it’s still a surprise—sometimes good, sometimes not.
I agree with the many posts. You have done an amazing job explaining every step. I will work hard following your routine and products to get better results.
Thank you for all the time and effort you have spent to help us.
PS: I LOVE YOUR CLUMPS! I don’t get those—yet!
Wow, thanks so much! I’m really glad to know the blog has been helpful to you! I hope this wash routine helps. 🙂 (And as for the curl clumps, thank you! I should probably do a post on this at some point, but typically, curls clump best with more moisture and the right products. Keep playing around with it and you’ll get there!)
Meghan, Thank you for the detailed blog! It was very easy to read, understand, and make notes! I decided sometime last year to give in to the fight with my hair as it seemed like a constant battle to keep it straight. I looked up CGM but it left me confused and a bit overwhelmed with all the information. I wrote down the basics (you now, ditch the towel, plop, praying hands, squish, repeat) but never really knew the “exact steps” to follow while washing/refreshing or even “how often to wash”. And then the pandemic hit, I was not going anywhere outside the walls, so obviously, I gave up. This evening I stumbled across your blog and now I have a much clearer direction. I believe my hair is a 2b/2c. Wash day is great, the next days after… not so much! Quick questions though – how often do you use a clarifying shampoo? and do you use a regular shampoo at every wash? Thanks again!
Hi Sheetu!
I’m so glad the blog could help! For what it’s worth, it took me a while before my hair was hydrated enough to look good when I refreshed. To answer your questions, I try to clarify every month, but I often forget, so it tends to be a little longer. But if I notice that there’s product flaking off my hair (not my scalp) or that my hair is just looking flat and weighed down, I clarify. Your hair seems a little wavier than mine, and from what I read about wavy hair, you may find the build-up more noticeable and want to stick closer to the one month mark (or do it more often if you think your hair needs it.)
And yes, I do use a regular sulfate-free shampoo every wash. In the early days, my hair was so dry I would wet my hair every day and alternate between shampoo washing and co-washing, but now that I wash more infrequently, I use the shampoo every time. I found that strictly co-washing didn’t do enough to get my scalp clean.
I hope this is some help!
Hi thanks for your blog. I find it so hard to hydrate my curls and by the end of day I have lots of frizz. Just wondering do you layer the 3 conditioners one at a time or mix them and add them?
Thanks so much for reading! 🙂 I layer them one at a time. I hope this helps!
Hi!! Tresemme botanique was my go to but now I’m losing it trying to find a new conditioner since tresemme changed their formula. Any suggestions!?
Yeah, I heard about the formula change. I’ve been working my way through the older post to note the change. Unfortunately, this conditioner got too heavy for my hair, so it’ll be hard for me to recommend something that’s truly comparable, but I did recently purchase a large bottle of a conditioner at a similar price point at Target(Mane ‘n Tail Conditioner). I haven’t had a chance to try it yet, but I’ll let you know how it works for me when I do. In the meantime, I’ve also really enjoyed the Not Your Mother’s Naturals conditioners in the past, especially the curl defining one. I wish I could be more help, but I hope this at least gives you something to work with! <3